本文概述
有时你想向AMP页面添加自定义交互性, 以使页面看起来更加用户友好和用户调用。尽管AMP的预建组件受到限制, 但还是通过amp-bind来解决此问题。它可以帮助开发人员在不使用AMP预制组件的情况下向页面添加自定义交互性。你可以使用amp-bind在用户与页面交互时动态更改文本。
设定:要在页面中使用amp-bind, 必须将其脚本导入文档的标题中。
HTML代码实例
<script async custom-element = "amp-bind"
     src = "https://cdn.ampproject.org/v0/amp-bind-0.1.js">
</script>
Google AMP的功放绑定包括三个主要概念:
- 州:状态变量负责根据用户操作在页面上进行更新。定义状态变量非常重要。
- 表达:它们就像用于引用状态的JavaScript表达式一样。
- 捆绑:它们是一种特殊的属性, 用于通过表达式将元素的属性链接到状态。
为了绑定文本, 我们将利用属性, 它有助于动态更改文本。
例子:
HTML代码实例
<!doctype html>
<html amp>
<head>
<meta charset = "utf-8">
<title>Google AMP amp-bind</title>
<link rel = "canonical" href =
"https://amp.dev/documentation/examples/components/amp-bind/index.html">
<meta name = "viewport" content =
"width=device-width, minimum-scale=1, initial-scale=1">
<script async src =
"https://cdn.ampproject.org/v0.js">
</script>
<script async custom-element = "amp-bind"
src = "https://cdn.ampproject.org/v0/amp-bind-0.1.js">
</script>
<style amp-boilerplate>
body {
-webkit-animation: -amp-start 8s
steps(1, end) 0s 1 normal both;
-moz-animation: -amp-start 8s
steps(1, end) 0s 1 normal both;
-ms-animation: -amp-start 8s
steps(1, end) 0s 1 normal both;
animation: -amp-start 8s
steps(1, end) 0s 1 normal both;
}
@-webkit-keyframes -amp-start {
from {
visibility: hidden
}
to {
visibility: visible
}
}
@-moz-keyframes -amp-start {
from {
visibility: hidden
}
to {
visibility: visible
}
}
@-ms-keyframes -amp-start {
from {
visibility: hidden
}
to {
visibility: visible
}
}
@-o-keyframes -amp-start {
from {
visibility: hidden
}
to {
visibility: visible
}
}
@keyframes -amp-start {
from {
visibility: hidden
}
to {
visibility: visible
}
}
</style>
<noscript>
<style amp-boilerplate>
body {
-webkit-animation: none;
-moz-animation: none;
-ms-animation: none;
animation: none
}
</style>
</noscript>
<style amp-custom>
h1 {
color: forestgreen;
text-align: center;
}
</style>
</head>
<body>
<h1>
Geeks For Geeks
</h1>
<div style = "padding: 1em;">
<div style = "color: crimson;">
Welcome <span ="myText">
to srcmini</span>
</div>
<br>
<button on =
"tap:AMP.setState({ myText: 'Geek' })">
Click Me!!
</button>
</div>
</body>
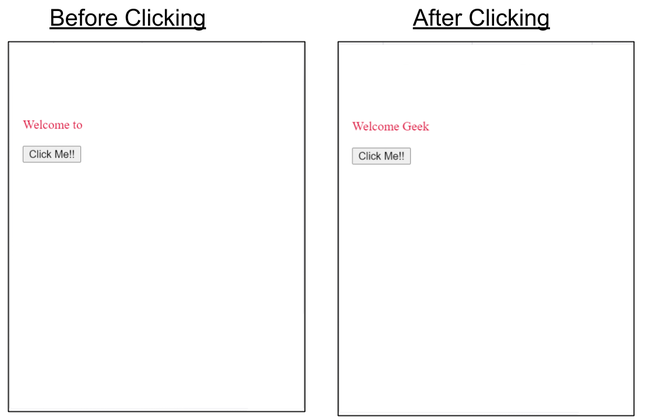
</html>输出如下:
来源:
https://www.srcmini02.com/68430.html


