上一章React
Native实战教程请查看:React
Native设置元素样式
为了适应不同的屏幕尺寸,React
Native提供了Flexbox支持。
我们将使用与React
Native设置元素样式一章中相同的代码,我们只更改PresentationalComponent。
Flexbox布局
为了实现理想的布局,flexbox提供了三个主要特性——flexDirection、justifyContent和alignItems。
下表显示了可能的选项。
| 属性 | 值 | 说明 |
| flexDirection | ‘column’, ‘row’ | 用于指定元素是垂直对齐还是水平对齐。 |
| justifyContent | ‘center’, ‘flex-start’, ‘flex-end’, ‘space-around’, ‘space-between’ | 用于确定元素在容器内的分布方式。 |
| alignItems | ‘center’, ‘flex-start’, ‘flex-end’, ‘stretched’ | 用于确定元素应如何沿着次轴(与弯曲方向相反)在容器内分布 |
如果想要垂直对齐和集中这些项,那么可以使用以下代码。
App.js
import React, {Component} from 'react';
import {View, StyleSheet} from 'react-native';

const Home = props => {
  return (
    <View style={styles.container}>
      <View style={styles.redbox} />
      <View style={styles.bluebox} />
      <View style={styles.blackbox} />
    </View>
  );
};

export default Home;

const styles = StyleSheet.create({
  container: {
    flexDirection: 'column',
    justifyContent: 'center',
    alignItems: 'center',
    backgroundColor: 'grey',
    height: 600,
  },
  redbox: {
    width: 100,
    height: 100,
    backgroundColor: 'red',
  },
  bluebox: {
    width: 100,
    height: 100,
    backgroundColor: 'blue',
  },
  blackbox: {
    width: 100,
    height: 100,
    backgroundColor: 'black',
  },
});
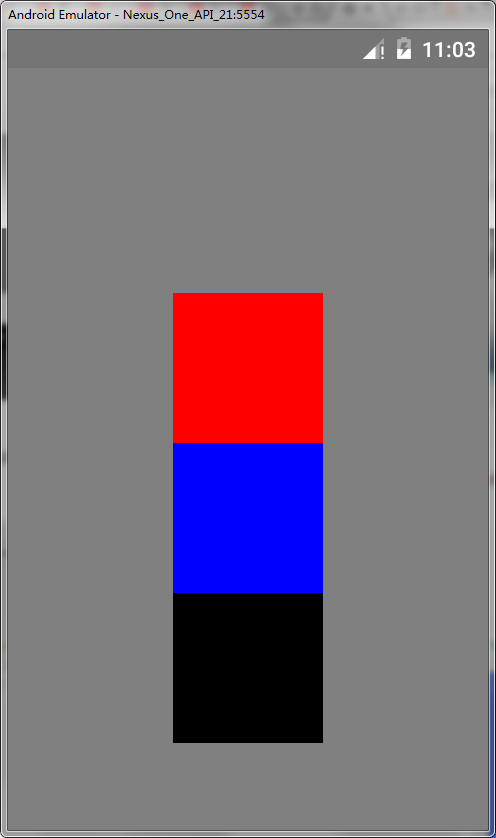
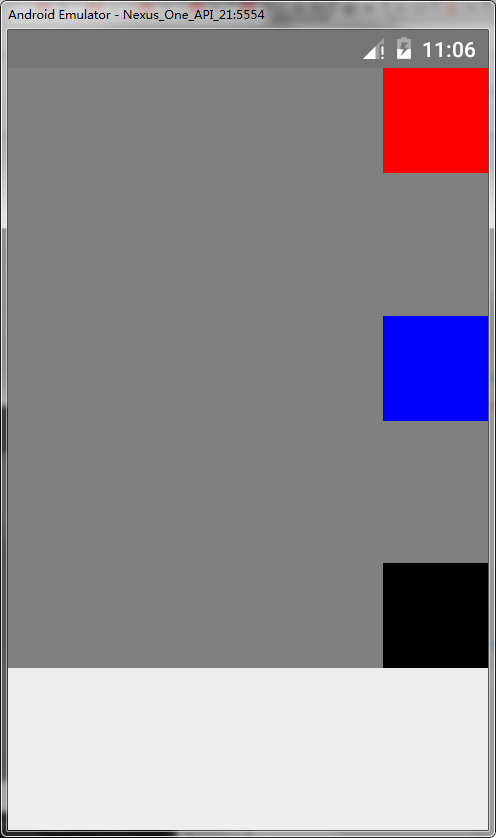
如果需要将项移动到右侧,并且需要在它们之间添加空格,那么我们可以使用以下代码。
App.js
import React, {Component} from 'react';
import {View, StyleSheet} from 'react-native';

const App = props => {
  return (
    <View style={styles.container}>
      <View style={styles.redbox} />
      <View style={styles.bluebox} />
      <View style={styles.blackbox} />
    </View>
  );
};

export default App;

const styles = StyleSheet.create({
  container: {
    flexDirection: 'column',
    justifyContent: 'space-between',
    alignItems: 'flex-end',
    backgroundColor: 'grey',
    height: 400,
  },
  redbox: {
    width: 70,
    height: 70,
    backgroundColor: 'red',
  },
  bluebox: {
    width: 70,
    height: 70,
    backgroundColor: 'blue',
  },
  blackbox: {
    width: 70,
    height: 70,
    backgroundColor: 'black',
  },
});
